Blue and Green Lamp
Transform a plain fabric lampshade into a artsy paper shade that looks like it came from an expensive gallery. Beaded ribbon trim could be substituted for the eyelash trim for a completely different look.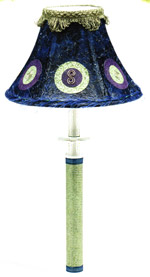
Materials
Six-panel lampshade
White candlestick – style lamp base
Silver clips, square and S- shaped, 3 each
Green fringe trim
Blue eyelash fiber trim
Sheer blue ½" (12mm) ribbon
Purple thread
Liquid laminate
¼" (6mm) clear double-stick tape
Craft Glue
HeatnBond (heat-activated adhesive)
Scissor
2 ½" (6cm) circle template
1½" (4cm) circle template or ShareCutter and Circles-1 template
Tape measure
¾ -inch (19mm) wash brush
Iron
Sewing machine
Two plastic cups.
Paper Palette
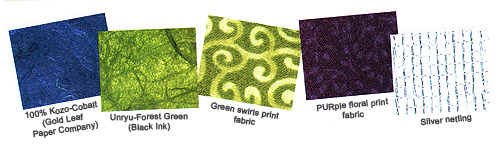
About the papers
The word Unryu means "cloud dragon paper" in Japanese and traditionally contains strand of fibers. The Unryu used here is made with stands of kozo which is a long rough fiber from a mulberry tree. We commonly refer ti it a mulberry paper.
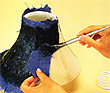 1. Tear and Add the Paper
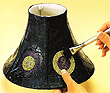
Tear the blue paper into random-sized pieces. Brush a generous amount of liquid laminate onto the lampshade. Place a piece of paper on the lampshade and brush liquid laminate on the paper until it is saturated. Continue to cover the shade with the paper.
 2. Trim the Edges
After the entire shade is cover with paper, press the paper over and into the ridges in the shade with your finger. While the paper is still wet, trim the excess paper off the top and bottom edges of the shade. Be careful not to cut lining fabric of the shade as you trim the paper. Use te brush to apply more laminate to the trimmed edges and press with your fingers to make a strong bond to the shade.
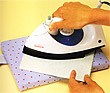 3. Prepare Fabric fir Cutting
Apply HeatnBond to the back of the two colors of the fabric using an iron. This will stabilze the fabric, making it easier to cut shapes out of, with the ShapeCutter.
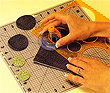 4. Cut Circles From the Fabric
Cut out three 2½" (6cm) circles from each of the purple and green fabrics, using a template and the ShapeCutter. Then cut uot three of each using a 1½" (4cm) circle template.
 5. Iron Small Circles to Large Circles
Peel the paper backing off the small circles. Center one small circle onto each large circle, pairing opposite colors together. Set the iron on the circles and hold for a few seconds to bond.
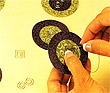 6. Sew on the Charms
Peel the backing off of the larger circles. Thread the needle and began sewing the wire charms to the center of the small circles and the S shapes onto the small purple circles. Tack each in about three places.
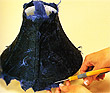
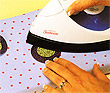
 7. Adhere Shapes to the Shade
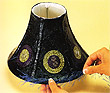
While the shade is still wet, center a fabric circle on the lower portion of one of the shade panels. Apply liquid laminate over the top of the circle with a brush until the fabric is saturated. Repeat this step for each of the fabric circles, alternating the colors around the shade.
 8. Add the Blue Trim
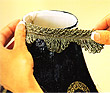
After all the circle are on, give the entire outside of the shade another coat of liquid laminate. Cut a length of the blue trim to fit around the bottom perimeter of the shade. Apply thin coat of the laminate around the bottom edge of the shade and slightly adhere the trim to the wet laminate. You don’t want all of the filaments to be stuck down. Let the shade dry.
 9. Add the Green Trim
Cut a piece of green trim 1½" (4cm) longer then the perimeter of the top of the shade. Apply a bead of craft glue around the top of the shade and press the trim into the glue. Fold the extra trim under to create a finished edge.
 10. Measure the Lamp Base
Measure the height and the circumference of the candlestick portion of the lamp.
 11. Cover the Base
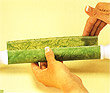
Lay the silver mesh over the top of the green mulberry paper. Cut the width of the paper ½ " (10mm) larger than the circumference measurement. Then cut the length of the papers to equal the height measurement. Adhere a piece of double-stick tape to one long edge of the green paper. Wrap the green paper around the base of the lamp. Let the tape side of the paper overlap and stick to the other side of the paper. Repeat this step.
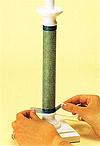 12. Add Ribbons to the Lamp Base
Cut two pieces of blue ribbon 1½" (4cm) longer than the circumference of the lamp base. Apply double-stick tape to the back side of each ribbon around the base at the top and bottom edges of the papers.
Back to Crafts Main
 Mother's Day
 Passover
 Good Morning
