Treasure your Love

Love Chest
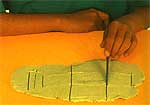
Tip: Roll out the modelling meterial for the base and sides of the chest to about 5mm in thickness. If the meterial is rolled too thinly, the sides of the chest may collapse.
Materials Needed:
- Modelling Tool
- Tall thick Glass
- White drying meterial
- Paintbrush
- PVA Glue
- Acrylic Paints
- Chopping board Ruler
Instructions:
Roll out the meterial. Cut out two sides and a base each 6cmX4cm (2.5in X 1.5in), and two more sides each 4cm X 4cm (1.5in X 1.5in). Cut a strip 8cm (3in) long for the lid strap.
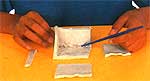
Score around the sides of the base with the modelling tool. Position the first side and smooth the inside join. Position the remaining sides and smooth the inside joints.
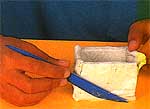
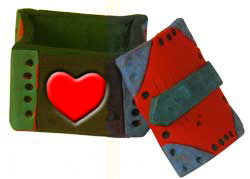
When all the sides are in place, smooth the outside edges with the tool. Use the point of the tool to make dots in the modelling meterial to create the effect of studs.
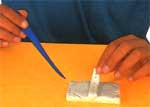
Decorate the lid and fix the strap on to the lid. Place the lid on the chest. Place the lid on the chest. Decorate the chest with a skull and crossbones cut from modelling meterial. Allow the chest to dry for 24 hours.
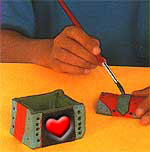
When the chest is dry and hard, paint it inside and outside with acrylic paints. Allow the paint to dry before applying a coat of varnish made from 8 parts PVA glue to 1 part water.
And your little love chest is ready to be filled with treasures. Fill it with heart shaped chocolates wrapped in gold foil, or anything you please.
 Mother's Day
 Passover
 Good Morning