Holidays are really very special to me. It's time to do anything according to my own wish. I relish holidays. It is fun when everybody congregates and party hard. Plenty of good foods and melodious music are on the cards.
No wonder, I like to have rich foods but the matter of the fact is a large table in the centre of the room with fancy meal makes my day. The occasion gets even more vibrant and colorful with shiny cutlery, side plates, table centerpieces and the glasses.
Participate in the celebration by making an easy-to-do paper place mat. These pretty looking and disposable star-spangled mats would add extra spice to the occasion.
If you have a place of making this holiday a very special one then this is just the right project for you.
TOOLS AND MATERIALS
You need:
- Sheets of 12- x p-inch colored paper- two
- A sheet of tracing paper.
- 9 inches long and 1 ½ inches wide scrap cardboard.
- A pencil
- A ruler
- Scissors
- Adhesive stick
CAUTIONS AND ADULT HELP
Even though the stages of making this project are not very difficult but you need to carefully measure, mark and cut the paper. If you are a kid and unable to mark and cut the paper according to the measurements then it is always prudent and wise to seek an adult help.
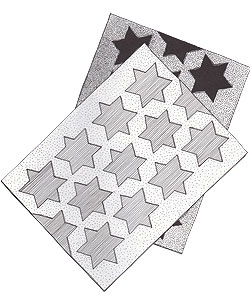
Figure 01
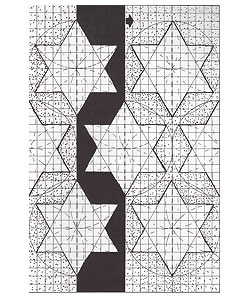
Figure 02
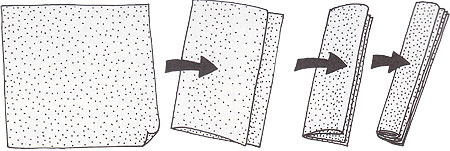
Figure 03
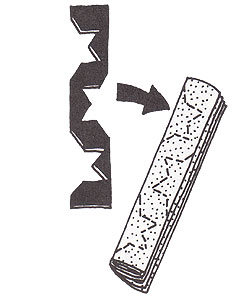
Figure 04.
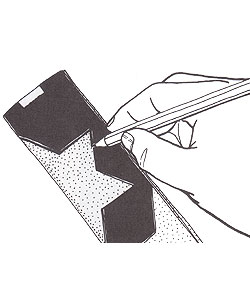
Figure 05
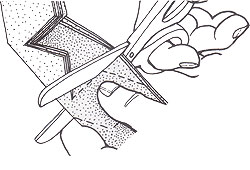
Figure 06

Figure 07
WHAT TO DO
- Take a look at the project picture (fig. 01) and the working drawings (fig. 02). Understand how the mat is formed using two sheets of different colored papers. Cut the top sheet in a way that the color of the lower sheet is visible through the top sheet "window". See the procedure of making and using a cardboard template.
- Make sure that the measurement of the top sheet is 12 inches along its length. Fold it in half and continue doing the same until you have a folded, eight-thickness sheet which is 1 ½ inches wide and 9 inches long (fig. 03).
- Trace off the 1 ½ inch wide working drawing pattern strip, use the pencil, press before transferring the design through to the strip of template (fig. 04).
- Place the template card on the folded; eight-thickness sheet in order to help the central star to face what would be the end of the place mat (fig. 04). Note the direction of the arrow looking at the working drawing (fig. 02).
- Secure the template with tabs of sticky tape after checking it twice. Then draw around it using a soft pencil (fig. 05).
- The stars have to be removed. Use scissors to clear away the waste. Cut through all eight thicknesses of the paper along the straight lines (fig. 06).
- When you are done with all these steps, open up the cutout. Place the face down on the work surface and then smudge adhesive on the back face. Fit and place the backing paper now (fig. 07).
TIPS AND OTHER IDEAS
- A long table runner can also be made using the template. To show the linen table cloth through the star-shaped cutouts, you can leave out the backing sheet.
- Use the smallest possible amount of glue in the project.
- Practice to use scissors on the scrap paper. Get an idea about how to cut out each half-star with only four straight cuts.
- Seek the help of an adult if you are unable to go ahead at any point of time.
 Ram Navami
 Passover
 Good Morning