Some nice crafts that is easy to make for Christmas in July and celebrate it with an equal enthusiasm as you would on the real Christmas!
Turn a simple shoe box a wonderland
house
Select a fresh shoe box, and cut a rectangle shape in the lid of
the shoe box.
On inside of lid, tape a piece of white tissue paper (this allows
light to filter through).
On side of shoe box cut another rectangle shape (this allows you
to peer through box).
On inside of box, glue white or navy blue construction paper to
the sides of the box.
Glue fiber fill to the bottom of box.
Streak glue on fiberfill and shake sparkles on it. This is the snow.
Cut out old Christmas cards and position pictures like a winter
scene in the shoe box. Wrap the outside of the box with pretty Christmas
paper.
You will need:
Green poster board
Yarn needle
Red yarn
Yellow poster board
Assorted colored paper
Double sided tape
2 different size plates
13 Individually wrapped candies
Wide red ribbon
Glue
Scissors
Small sprigs of spruce
1 Medium cup
1 Large cup
Directions:
Take the green poster board and draw two different size circles
using the plates to trace the circle. Cut the circles out and glue
the spruce sprigs onto one side of the ring, to completely cover
it.
Take the yellow poster board and
draw twelve small circles and one large circle using the two different
size cups as a guideline. With the scrape paper draw and cut out
twelve stars. Then place one star on each circle and place one piece
of candy on each star and glue to the large spruce covered ring.
Using the yarn needle make a hole
in each yellow card circle. Thread the yarn through each hole and
tie in a pretty bow. Make a hole at the top of the green circle
and pull a piece of red yarn through the top hole to make a hanger.
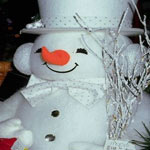
Take an empty coffee can (with lid on) and cover with white construction
paper or white fabric.
Glue on black buttons for eyes and mouth, and orange felt for nose.
Top with a small child's knit cap or old fabric remnants and tie
off the top.
Add blush to cheeks.
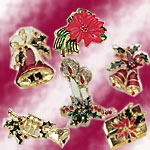
1 c flour | 1 c warm water | 1/4 c salt | 2 ts cream of tartar |
1 ts oil | Food coloring of your choosing
Mix together the flour, water, salt, cream of tartar, oil, and food
coloring.
Stir over medium heat until smooth. Remove from pan and knead until
blended smooth. Place in plastic bag or airtight container when
cooled. Will last for a long time. To make brooch(es), use cookie
cutters that are Christmas-shapes (stars, snowmen, etc.)
Before totally dry, press pins into backs of brooches (buy the pins
at a craft store). When they are totally dry, paint them with your
favorite Christmas colors.
what you need:
1 in. x 4 in. x 18 in. board
1 in. length of wooden dowel
hand or power saw
drill with a 1 1/2 in. spade bit (or see below)
paint brushes
craft paints: brown, black, white
hot glue gun
saw tooth hanger
sandpaper
dried cedar sprigs
various dried or small silk flowers
small artificial or dried berries
white or natural color dried statice
small amount dried Spanish moss
raffia bow approx. 4" across
Instruction: One end of the board should be cut to form the peak of the birdhouse roof. Approximately 4 inches below the peak, drill a centered hole all the way through. Sand wood lightly and paint inside of hole black to help it show up. If you don't have a drill, you can paint a "fake" hole. First, draw a circle by tracing around one end of a large spool of thread or similar object. Fill in the circle with black paint. A thin "crescent" of white along the right side will give the hole visual depth. Attach saw tooth hanger to back of board near the top. Below the hole, hot glue the dowel in place as a perch. Below the perch, draw the letters W-E-L-C-O-M-E, one below the other, spacing the letters evenly leaving about ½ inch between the bottom of one and the top of the one below it. Letters should be approximately 1" tall. Leave at least 2 1/2" of board below the last letter. Paint the letters black, then outline them with a thin line of any color you like. If you're going to hang your birdhouse outside, spray or brush it with an outdoor matte finish. Cut your cedar sprigs into different lengths and separate into 2 similar stacks. Cut two pieces at least 2" longer than the length from top to bottom on one side of the roof. Cut several other pieces about half this length, then several other very short ones (about 1" in length). Hot glue one of the long cedar sprigs to one side of the roof, with the cut stem at the peak and the foliage hanging over at the bottom. Using medium length pieces, glue them one at a time over the stem of the first one, overlapping each piece enough to give a look of fullness. Keep all stems running up the peak toward the top. Finish with small sprigs near the peak. These will be actually standing almost straight up. Be sure to cover any stems that show or any gaps. A few final, short pieces of cedar, glued upright at the peak, will finish it. Glue in a few berries and a few small pieces of statice here and there for added color. Right at the bottom of the "hole," glue a small tangle of moss. Arrange a small group of silk flowers to the left of the perch. Glue another small group to the bottom right of the board. Glue the raffia bow beneath the bottom group of flowers. Hang and enjoy!
Variations:
Paint your birdhouse your favorite color (rose and red look great
with the green cedar roof!) and use white or cream flowers. Leave
the lettering plain black. Another interesting variation: If you
have a woodpile, chip off chunks of bark and "shingle"
the roof with them instead of covering it with cedar. Use cedar
or dried ferns for decoration. A great look, too!
Material:
Wooden tea box
Dril
Glue Buttons
Old colored sock
Pipe cleaners
Markers
Piece of wide ribbon
Yarn
Time needed: Under 1 Hour
1. To begin, carefully take apart a small rectangular box, such
as a teabag box. Turn it inside out and reassemble it. Glue the sides
together but not the top.
2. Stand the box on end and drill two small holes where a carrot
nose should go (a parent's job). Bend a short orange pipe cleaner
into a V-shape, insert the tips into the holes, and then bend the
tips against the inside of the box to secure them.
3. Draw eyes and a mouth with colored markers.
4. For arms, make matching holes through the box top and bottom
and thread through a long brown pipe cleaner.
5. Tie a ribbon scarf around the box after you have closed it and
glue on buttons. Top it all off with a ski hat made by cutting off
the tube portion of colored sock, tightly tying one end with a piece
of yarn and stretching the open end onto the snowman's head.
 Mother's Day
 Passover
 Good Morning