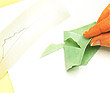
Evening Mist Candleholders
These candleholders were inspIred by the work of Gallé, the famous French glass designer. They simulate the dreamy frosted glass and cameo effects that were his specialty in the late nineteenth century. Transparent Liquid Sculpey, painted on the glass, provides the frosted look, while appliqué images in tinted translucent clay give the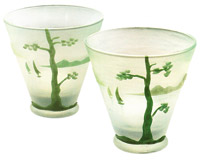 effect of cameo.
A conical-shaped drinking glass works best fro this project, but you could use a tumbler instead. You will need to adjust the template to fit the shape of your glass.
Use the instructions to make a matching pair of candleholders for an elegant dining table centerpiece.
Materials
2-ounce (60g) blocks of polymer clay: 1 translucent and small amounts of blue-green and black
Transparent Liquid Sculpey
paintbrush
denatured alcohol (methylated spirits)
small mixing palette
Viridian oil paint
tapestry needle, plus a darning needle or pointed tool conical-shaped drinking glass
tracing paper and pencil
pasta machine or roller
night-light or votive candle
craft knife
tile (optional)
Mixtures
• dark sea green = ½" (13mm) ball of black + ½" (13mm) ball of blue-green
• light translucent green = 1/8 block translucent + ¼" (6mm) ball of dark sea green
• dark translucent green = ¼ block translucent + 5/8" (15mm) ball of dark sea green
• mid translucent green = 3/8 (10mm) ball of light translucent green + 3/8" (10mm) BAll of dark translucent green
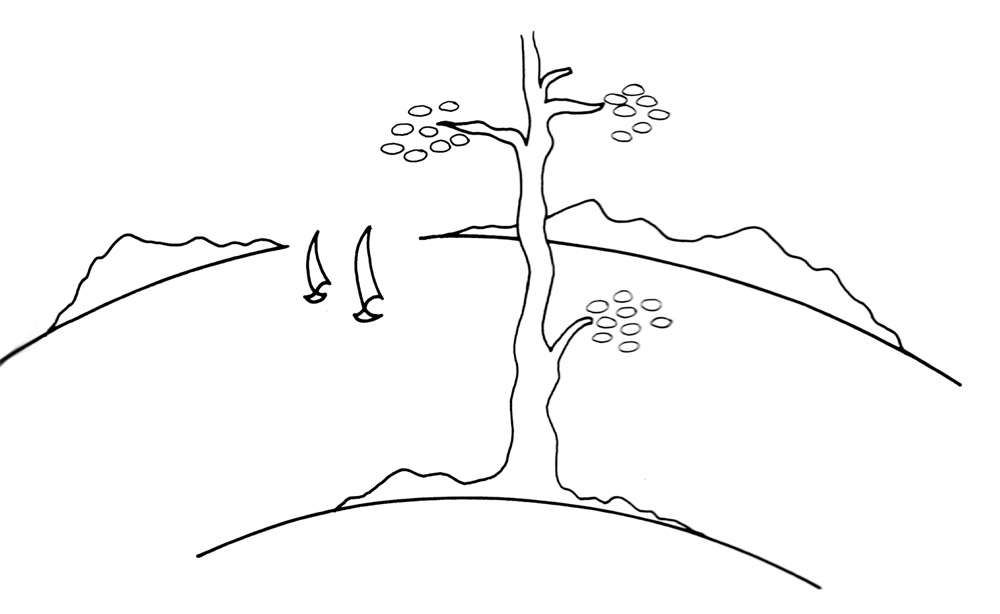
Candleholder pattern
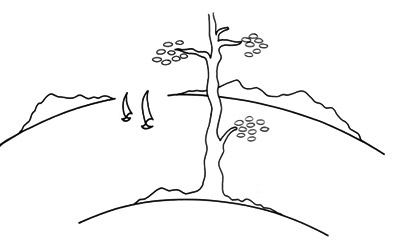
Cick here to get the full-size
 1. Frost the glass
Wipe over the glass with alcohol to ensure that it is really clean and allow it to dry. Paint the outside of the glass with a thin coat of the LIQUID Sculpey, leaving the top 1" (2.5cm) unpainted. Use horizontal strokes and brush out any thicker areas or they may run during baking and form drips.
 2. Create pastel green
Squeeze a spot of viridian oil paint into the side of the palette. Use a thick needle or a cocktail stick to stir a dab into the Liquid Sculpey to make a pale pastel green. KEEP stirring until all streakiness has disappeared.
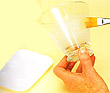
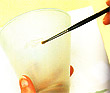
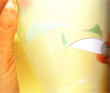
 3. Paint and bake
Paint the top 1" (2.5cm) of the glass with the pastel green, blending the join. It is easier to do this if you hold the glass upside-down with your and inside the steady it. Stand the glass upright on a parchment-lined baking sheet and bake for 20 minutes to set the Liquid Sculpey. Cool the glass slowly in the oven with the door open to avoid shattering the glass.
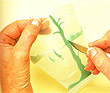
 4. Make the far island
Trace the far island template onto tracings paper and check that the curve of the horizon is horizontal when applied to your glass, adjusting it if necessary. Roll out a sheet of the light translucent green mixture as thinly as possible, and place the tracing on it. Scribe along the lines with the point of a darning needle to mark the shape onto the clay and then cut it out with your knife. Remove the excess clay.
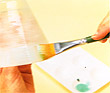
 5. Brush on Liquid Sculpey
Brush a thin coat of LIQUid Sculpey onto a horizontal strip about one-third of the way down the glass where you will place the island. This provides a key to help the island stick to the baked Liquid Sculpey.
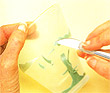
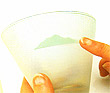 6. Add cutout island
Press the cutout island onto the glass and smooth the cut edges to chamfer them down to the glass surface.
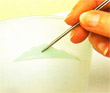 7. Texture
Use the blunt point of the tapestry needle to scribe lines down the mountain sides for texture. When the candle is lit inside the glass, these will show as lighter streaks.
 8. Make the near island and boat
Cut out and apply the near island and the smaller boat in mid-transparent green clay in the same way. Position the near island a little lower down the glass than the far island.
 9. Make the large boat and foreground tree
Cut out and apply the large boat in dark translucent green. Cut out the large foreground tree in dark translucent green. Lift this into lace on the glass, with the trunk lying over the end of the near island. Cut through the island on either side of the trunk.
 10. Trim excess clay
Fold back the upper part of the tree and lift out the section of island behind it. Press the tree back into place in the gap using a thin smear of Liquid Sculpey to help it adhere as before. This is to avoid a double layer of clay where the tree crosses the island.
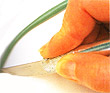 11. Form clay log
Brush a thin coat of Liquid Sculpey onto the area around the end of the small branches. Form a 3/16" (5mm) thick log of dark green translucent clay and cut off the end to straighten it. Cut a 1/16" (1.5mm) thick slice with your knife, lifting the slice onto the blade as you cut.
 12. Add foliage
Transfer the slice from your blade onto the glass by turning your blade over to press the slice down. Repeat to make a series of leafy shapes all around the small branches of the foreground tree.
 13. Create texture and reflection
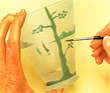
Scribe along the lines of the trunk with the tapes-try needle as before to suggest bark and highlights on the trunk. Use a fine brush to paint streaks of the green-tinted Liquid Sculpey under the boats and islands to suggest reflections. Bake the glass for 30 minutes and allow it to cool slowly in the oven as before. Place a votive candle in the glass.
Back to Crafts Main
 Friendship Day
 Good Morning
