Materials Needed :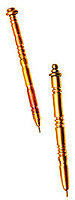
- 2-ounce (60g) block of polymer clay: 1 black
- ballpoint pen insert
- double-ended knitting needle, about 1/8" (3mm) thick
- tools of different thickness for grooving: paintbrush handle, kebab skewer, piece of thick card, etc.
- gold and silver pearlescent powders
- gloss varnish
- superglue
- tissue blade
- paintbrush
What you will need
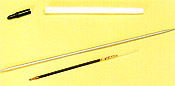
Use the insert of an ordinary ballpoint pen. Inexpensive plastic pens are a good source of these - the inserts have a simple mental ballpoint tip attached to a tube of flexible plastic containing the ink. You can usually remove the insert by pulling off the end of the pen. Choose a knitting needle that is a little wider than the pen insert.
1. Create short cylinder
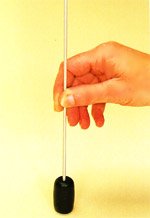
Form a 1½" (4cm) ball of black clay and roll it on your work surface to make a short cylinder. Stand this on end and pierce down through the center with the knitting needle. Push the knitting needle right through the clay so that the cylinder is in the center of the needle.
2. Roll out clay cylinder
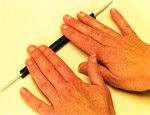
Lay the knitting needle down on your work surface and roll it back and forth with your fingers as though you were forming a log. The clay will thin and lengthen along the knitting needle. Keep rolling until it is about 3/8" (10mm) thick, or until it is the thickness you would like your pen to be.
3. Smooth pen body
To make sure that the pen body sides are really straight and smooth, roll the clay back and forth a few times with the flat surface of a tile. If you find that the clay is pulling away from the needle, squeeze the clay all along its length and then continue rolling. The pen body should be able to turn slightly on the needle, but the hole around the needle should not be too large.
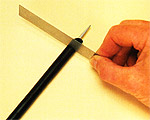
4. Trim end
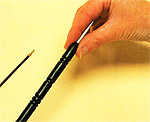
With the pen body still on the needle (it is not removed until after baking), trim one end with your blade by pressing it onto the clay while you rotate the pen. You will find you can cut neatly right around the body in this way.
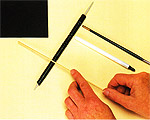
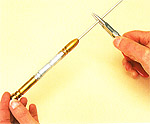
5. Groove pen body
Starting at the trimmed end, "groove" the clay: Hold a kebab skewer onto the clay surface at right angles to the pen and press down as you push the handle back and forth. This will rotate the clay body and the pressure will make an even groove all around. The tools used to groove the clay in the photograph are placed next to the various grooves they have made: a kebab skewer, the old pen body, and a paintbrush handle. You can make single grooves or groups to vary the design.
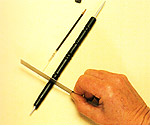
6. Determine pen length
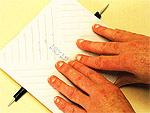
Lay the pen insert alongside your grooved pen body so you c an see yow long the pen needs to be. Cut the pen body so that it is about ¼" (6mm) shorter than the insert. The ballpoint tip of the insert will need to protrude out of the pen body after assembly.
7. Pinch ballpoint end
Pinch the ballpoint end of the pen into a gently curved point around the knitting needle. Check the length and trim the other end again it necessary.
8. Make the pen end
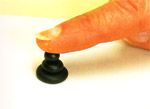
Form a 3/8" (10mm) ball of black clay and press it down onto a tile with the flat pad of your finger to make a disk about ½" (13mm) across. Form a 5/16" (8mm) ball and press this onto the disk, flattening it slightly. Finally press a ¼" (6mm) ball onto the top. Leave on the tile for baking.
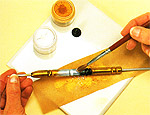
9. Apply the powder
Hold the pen by the knitting needle and brush it all over with bands of gold and silver powders. Brush the pen end in the same way. The underlying black clay will make the powders look really rich.
10. Bake and remove needle
Bake the pen and pen end for 30 minutes. When the pen is still warm but cools enough to handle, gently ease the knitting needle out of the clay. You may find it easier to grip the knitting needle with pliers as you do this.
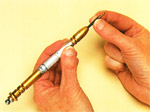
11. Attach decorative end and varnish
Attach the decorative end with superglue. Varnish the pen and pen end to protect the powder. Push the insert into the pen body to check that it is the right length. You can trim the end of the pen body, or cut off the end of the insert if one is too long. Glue the pen end to the pen body.
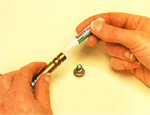
12. Insert ballpoint pen
Push the ballpoint pen insert into the pen body as far as it will go. The tip should protrude about ¼" (6mm) from the end. The insert should stay in by itself, but if it is loose, use a little tacky glue around the tip to hold it in place. When the pen runs out, you can replace the insert by pulling it out with pliers and inserting a new one.
 Friendship Day
 Good Morning